How to Soundproof a Home Gym: A Practical Guide
If you’ve ever dropped a dumbbell in your home gym or blasted music during a cardio session, you know: noise travels fast. For people living in apartments, shared houses, or with family, this noise can cause frustration or even complaints. But the good news is, you don’t have to give up your workouts. With the right soundproofing, you can lift, jump, and row without disturbing others. In this guide, you’ll learn exactly how to soundproof a home gym, from simple fixes to advanced solutions. You’ll find practical steps, real-world examples, and expert insights—everything you need to turn your noisy gym into a quiet, focused space.

Why Soundproofing Matters In A Home Gym
Many people underestimate how loud home gyms can get. Weights dropping, treadmills running, and even motivational music add up. For example, a standard barbell drop can reach 90 decibels—about as loud as a motorcycle. Repeated impact, especially in multi-story homes, sends vibrations through floors and walls. This isn’t just annoying; over time, these vibrations can also damage your home’s structure.
If you live in a multi-unit building, noise can travel through shared floors and walls, causing friction with neighbors. Even in single-family homes, loud workouts can disturb family members—especially early mornings or late nights. One overlooked problem: repeated impact from weights or jumping can slowly loosen floorboards or drywall joints. Over months or years, this creates cracks and small gaps that make noise problems worse.
Soundproofing isn’t only about noise reduction. It also:
- Creates privacy for your workout routines
- Increases your focus by reducing distractions
- Prevents long-term damage to walls and floors
- Improves home value by protecting finishes and adding comfort
Another benefit is mental comfort. When you know your gym is quiet, you worry less about bothering others. This lets you work out harder, play music, or even record workout videos without hesitation. For people working from home, soundproofing also prevents gym noise from leaking into office spaces or conference calls.
If you want a gym that feels professional and private, soundproofing is a smart investment.
Understanding Sound: Airborne Vs. Impact Noise
Before you start, it’s important to know the two main types of noise in a home gym:
- Airborne noise: Sounds like music, voices, and clanking weights that travel through the air.
- Impact noise: Vibrations from jumping, running, or dropping weights that travel through floors, walls, and ceilings.
Each type needs a different approach. For example, thick insulation helps with airborne noise, while shock-absorbing mats help with impact noise. Most home gyms produce both kinds, so your soundproofing plan should address them together.
It helps to identify which noise is your biggest problem. If you hear echoes or loud music in other rooms, focus on airborne fixes like panels and insulation. If complaints are about thumping or vibration, concentrate on impact fixes like platforms and mats.
Some beginners forget that vibration travels much further than airborne sound. For instance, dropping a dumbbell on a hard floor can be felt in a room two stories away, even if the sound isn’t loud.
Assessing Your Home Gym’s Noise Issues
Every home gym is different. Basement gyms, for example, transmit less noise to neighbors but can still echo inside the house. Garage gyms may leak sound outdoors. Start by identifying your main issues:
- Where does sound escape most? (walls, ceiling, door, or floor)
- When does noise bother others? (time of day, type of exercise)
- What equipment is loudest? (treadmill, free weights, etc.)
A simple test: Have someone exercise while you listen from outside the room. Note where you hear the most noise. This will help you prioritize your soundproofing steps.
Another method is to record a video with your phone in another room while someone works out. Later, play back and listen for thumps, echoes, or music. If you hear noise through the ceiling, focus on insulation above. If noise escapes under doors, seal gaps or upgrade the door.
Beginners often skip this testing step, but it saves money by showing exactly where fixes are needed.
Key Soundproofing Principles
You don’t need to be an engineer to understand the basics. Good soundproofing uses four main principles:
- Mass: Heavier, denser materials block sound better.
- Decoupling: Separating walls, floors, or ceilings so vibrations can’t travel directly.
- Absorption: Soft materials soak up sound energy.
- Damping: Special compounds reduce vibration energy as heat.
For most home gyms, combining these methods works best. You don’t have to rebuild your gym—small changes add up.
For example, adding mass can be as simple as using heavier mats or double drywall. Decoupling is more advanced but can be done with resilient channels during renovations. Absorption works best for airborne noise; think foam panels or carpets. Damping is often overlooked but makes a big difference—Green Glue or damping pads can reduce vibrations before they spread.
A common mistake is relying only on absorption (like foam panels), which helps with echo but not with vibration. Balancing all four principles leads to a quieter gym.
Soundproofing The Floor
The floor is the most critical area in any home gym. Most impact noise starts here, especially with weightlifting or cardio machines.
Best Flooring Options For Soundproofing
Here’s a quick comparison of common gym flooring materials:
| Material | Impact Noise Reduction | Durability | Cost (per sq ft) |
|---|---|---|---|
| Rubber Mats (3/4″) | Excellent | High | $2–$6 |
| Foam Tiles | Good | Medium | $1–$3 |
| Cork Flooring | Good | Medium | $3–$8 |
| Carpet | Fair | Low | $1–$4 |
| Vinyl | Poor | High | $2–$7 |
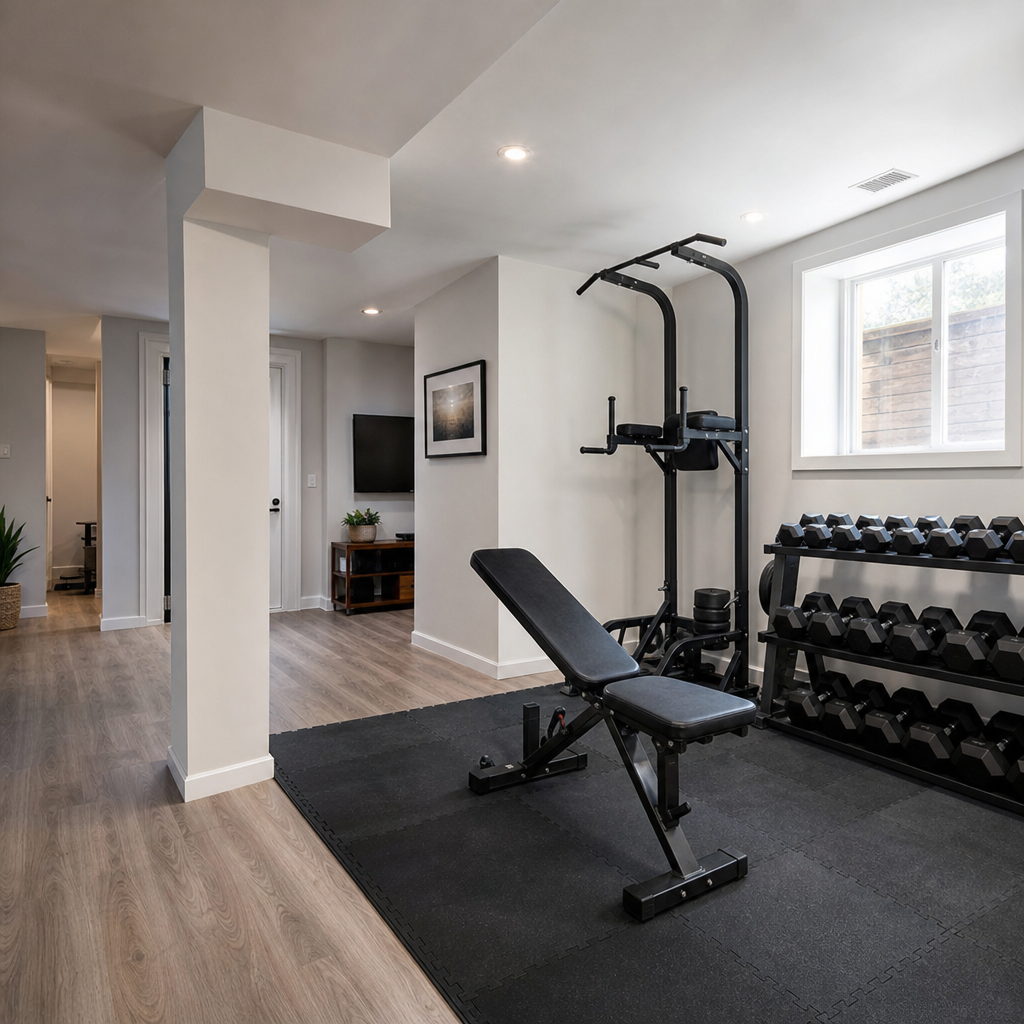
Rubber mats (at least 3/4 inch thick) are best for absorbing impact and reducing vibrations. For heavy lifters, consider placing a plywood platform under rubber mats for extra mass.
Pro tip: Double-layer mats or combine rubber with foam for even better results. Place mats under all cardio machines, weight racks, and wherever you drop weights.
One practical example: If you do Olympic lifts, a platform with rubber mats and plywood stops almost all impact noise. For HIIT or plyometric workouts, softer foam tiles reduce joint stress and absorb some noise, but they wear out faster under heavy equipment.
Using Platforms And Shock Absorbers
If you drop weights often, a lifting platform can make a big difference. Build a simple platform using:
- Two layers of 3/4″ plywood
- One or two layers of horse stall mats or high-density rubber
This setup stops most impact noise before it reaches the floor. For treadmills and rowers, use anti-vibration pads under each foot to reduce noise.
Isolation pads are available for most machines. For example, a treadmill’s feet can be placed on thick rubber or silicone pads, which absorb vibration and prevent it from spreading through the floor. Some beginners skip this step, but it’s a low-cost upgrade that helps a lot.
Sealing Floor Gaps
Small gaps allow noise to escape. Use acoustic sealant around the edges of your flooring and under baseboards. This is a cheap but effective fix.
For extra protection, add a thin layer of foam tape between the floor and baseboards. This blocks both air gaps and vibration, especially in older homes with uneven floors.
Soundproofing Walls
Walls are the main barrier between your gym and other rooms. Standard drywall blocks some sound, but not enough for serious workouts.
Adding Mass And Damping
- Mass loaded vinyl (MLV): This heavy, flexible sheet adds mass without much thickness. Attach it to walls before adding drywall.
- Double drywall with Green Glue: Install a second layer of drywall using Green Glue, a damping compound that absorbs sound energy.
This combination can reduce noise by 10-15 decibels—enough to turn loud clanks into faint thumps.
If you’re remodeling, consider adding mineral wool insulation inside walls for even better results. For existing walls, surface-mounted MLV or extra drywall are easiest. Beginners sometimes add only foam panels, but adding mass (MLV or drywall) is needed to block serious noise.
Using Acoustic Panels
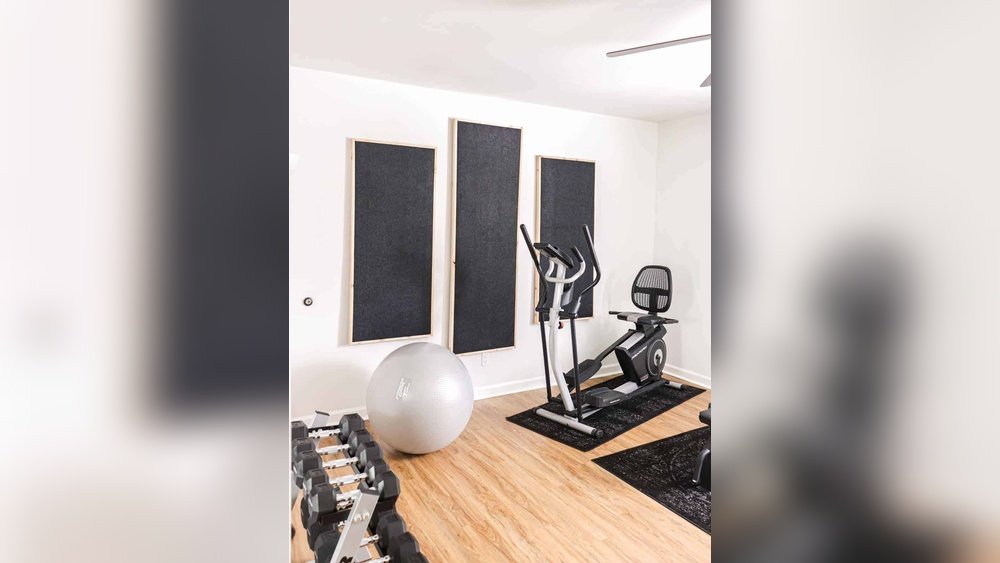
Acoustic foam panels or fabric-wrapped panels absorb echoes and airborne noise. Place panels on walls facing your workout area, especially near speakers or weight racks.
Insider tip: Cover at least 20-30% of wall area for best results. More panels aren’t always better—focus on where sound bounces most.
Panels can be custom-sized or bought pre-made. For music or video workouts, place panels behind speakers or screens to reduce echo. If your gym has mirrors, hang panels beside or above them—they reflect sound more than drywall.
Sealing Wall Outlets And Cracks
Even small holes leak sound. Use putty pads around electrical outlets, and fill cracks with acoustic caulk. Check for gaps behind baseboards and seal them.
Inspect for any holes left by old fixtures, cable runs, or wall damage. Beginners often miss these spots, but sealing them adds up to real noise reduction.
Soundproofing The Ceiling
Noise often escapes upward, especially if your gym is under bedrooms or living areas.
Decoupling The Ceiling
For serious soundproofing, use resilient channels or sound isolation clips when building or remodeling. These create a small air gap, breaking the direct path for vibrations.
If you can’t remodel, adding a layer of drywall with Green Glue helps. For basement gyms, consider suspended acoustic ceiling tiles, which both absorb sound and decouple the ceiling surface from the structure.
Adding Insulation
If you can access ceiling joists, add fiberglass or mineral wool insulation. Mineral wool is best for sound, as it’s denser.
If your gym is below a bedroom, this step is especially important. It keeps late-night workouts from disturbing sleepers. Some beginners skip ceiling insulation, focusing only on walls and floors, but ceiling upgrades often make the biggest difference in multi-story homes.
Installing Acoustic Tiles
For a finished look, add acoustic drop ceiling tiles. These reduce echo and block airborne noise. They’re common in professional studios and work well in home gyms.
Tiles can be installed in a weekend, and many designs are now available for home use. For extra absorption, choose tiles with a high NRC (Noise Reduction Coefficient) rating.
Soundproofing Doors And Windows
Doors and windows are weak spots in any soundproofing plan. A hollow door can leak as much sound as a wall without insulation.
Upgrading Your Door
- Replace hollow-core doors with solid-core doors for 50% more sound blocking.
- Add weatherstripping around the frame to seal gaps.
- Install a door sweep at the bottom.
These upgrades are simple but can reduce noise by 5-8 decibels—enough to make a noticeable difference.
Solid-core doors are heavier, blocking both airborne sound and some vibration. Weatherstripping is easy to install and prevents sound from escaping around the edges. A door sweep also keeps out dust and drafts—a bonus for gym comfort.
Treating Windows
- Use acoustic curtains or thick blackout drapes to absorb sound.
- Seal window edges with removable acoustic caulk.
- For maximum soundproofing, install a window plug (a removable panel with a foam core) for gym sessions.
Window plugs are DIY-friendly and can be stored when not in use. For gyms facing busy streets, plugs and curtains together block both outside and inside noise.
Managing Air Vents And Hvac Noise
Air vents are often overlooked. They let sound escape easily and can even amplify noise.
- Line ducts with acoustic foam or duct liner.
- Add a sound maze (zig-zag path inside the vent) to reduce direct noise travel.
- Seal unused vents with foam plugs during workouts.
Don’t block vents completely if you need airflow—overheating is a common gym mistake.
Another tip: Use flexible ductwork instead of rigid metal. Flexible ducts absorb more vibration and transmit less noise. If your gym has a wall-mounted AC or heater, check for gaps around the unit and seal them with foam tape.
Reducing Gym Equipment Noise
Some machines are noisier than others. Here’s a comparison of common equipment:
| Equipment | Noise Level (dB) | Vibration Risk | Best Soundproofing Fix |
|---|---|---|---|
| Treadmill | 60–80 | High | Rubber mat, anti-vibration pads |
| Rowing Machine | 60–70 | Medium | Foam mat, isolation pads |
| Elliptical | 55–65 | Medium | Rubber mat |
| Free Weights | 70–90 | Very High | Thick rubber mat, platform |
| Stationary Bike | 50–65 | Low | Foam mat |
Pro tip: If your treadmill or rower is especially loud, check for worn parts. Lubricate moving parts and tighten bolts regularly. Even small issues can add noise.
Another insight: Place heavier equipment near a wall, not the center of the room. Walls absorb and block vibration better than open space. For free weights, use bumper plates instead of metal plates—they’re quieter and cause less damage.
Diy Soundproofing Projects
Many soundproofing steps can be done without a contractor. Here are practical projects you can complete in a weekend:
- Lay interlocking rubber tiles: Quick to install and protect your floor and ears.
- Build a weight-dropping platform: Use plywood and rubber mats. Plans are widely available online.
- Hang acoustic panels: Use adhesive strips or hooks—no drilling required.
- Seal doors and windows: Apply weatherstripping, door sweeps, and caulk in an afternoon.
- Make a window plug: Cut a foam board to window size, cover with fabric, and press into the frame.
Each project tackles a different noise source. Combine them for the best effect.
If you have kids or pets, choose panels and mats that are easy to clean and resistant to wear. For renters, removable solutions like window plugs and adhesive panels avoid damage to walls and frames.

Common Soundproofing Mistakes To Avoid
Even with good intentions, it’s easy to waste time or money on the wrong solutions. Watch out for these mistakes:
- Using thin mats: Mats under 1/2 inch do little for heavy impact noise.
- Skipping the door: A weak door can ruin even the best soundproofed walls.
- Ignoring small gaps: Sound slips through cracks around outlets, windows, and baseboards.
- Overfilling the room with foam: Too many foam panels can make your gym stuffy and hot.
- Blocking ventilation: Always keep some airflow, or workouts will be uncomfortable.
Another mistake: Placing mats only under equipment, not in high-traffic areas. Always cover spots where you jump, drop weights, or do high-impact moves.
Remember, every gym is unique. Test solutions and adjust based on your results.
Advanced Soundproofing: When To Call A Pro
If you want a truly silent home gym, or if noise is affecting neighbors below or beside you, consider professional help. Experts can install:
- Staggered-stud or double-stud walls
- Decoupled ceiling systems
- Specialty soundproof doors and windows
- High-density insulation
These methods cost more but can reduce noise by 30 decibels or more—a big jump from DIY options. If you’re remodeling or building a new gym, plan for soundproofing from the start.
Professionals can also test for weak spots using decibel meters and thermal cameras. This shows exactly where noise escapes, saving time and money. If you live in a condo or apartment, check building rules before starting advanced projects.
Budgeting For A Soundproof Home Gym
Costs depend on your goals, room size, and whether you hire help. Here’s a rough guide:
- Basic DIY fixes (mats, caulk, panels): $200–$800
- Mid-level (platforms, solid-core doors, MLV): $800–$2,500
- Professional upgrades (walls, ceilings): $2,500–$8,000+
A small investment in good mats and panels often solves most problems. For heavy lifters or serious athletes, higher-end solutions pay off in comfort and peace.
For a typical 10×12 foot room, rubber mats and panels cost under $1,000. If you add a solid-core door and window treatments, expect $1,200–$1,700. For larger gyms or full remodels, budget extra for labor and specialty products.
Credit: fittransformer.com
Real-world Examples
Case Study 1: The Apartment Gym
Sarah set up a gym in her second-floor apartment. Her main problem was her neighbors below complaining about dropped weights. She installed 1-inch rubber mats under her entire workout area, added a plywood platform for deadlifts, and used acoustic panels on two walls.
After these changes, her neighbor reported noise dropped from “thunderous” to “barely noticeable. ”
Sarah also sealed her door with weatherstripping and hung thick curtains over her window. She noticed her gym felt warmer and quieter, and she could play music at normal volume without complaints.
Case Study 2: The Garage Powerlifter
Mike converted his garage for powerlifting. His main issue was noise leaking into the house. He installed mass loaded vinyl on the shared wall, sealed the door with weatherstripping, and used a double-thick lifting platform. These steps cut noise by over 70%, allowing him to train early in the morning without waking his family.
Mike also added mineral wool insulation above the garage ceiling, which stopped vibration from reaching bedrooms. He found that the garage stayed cooler and less dusty with these upgrades.
Case Study 3: The Basement Cardio Room
A family used their basement for group workouts. Echo and treadmill noise were big problems. They added mineral wool insulation to the ceiling, hung heavy curtains over windows, and placed foam mats under all machines. The result: Less echo and no complaints from upstairs rooms.
The family also covered two walls with fabric-wrapped panels, which improved music clarity and reduced shouting during video classes. Their basement became a comfortable space for both workouts and movie nights.
Choosing The Right Materials For Your Home Gym
With so many products available, it’s easy to get overwhelmed. Here’s what to focus on:
- For floors: Look for dense, heavy mats (minimum 3/4 inch for impact, 1/2 inch for cardio).
- For walls: Mass loaded vinyl, double drywall, or acoustic panels.
- For ceilings: Mineral wool insulation and, if possible, isolation clips.
- For doors/windows: Solid-core doors and acoustic curtains.
Always check reviews and buy from trusted brands. Cheaper products may not perform as well or last as long.
If you’re unsure, buy a small sample before committing. Some mats smell strong at first; look for low-VOC or recycled materials. For panels, check fire ratings and choose fabric that resists moisture and dust.
Credit: topfloorings.com
How Soundproofing Affects Gym Performance
A well-soundproofed gym does more than keep the peace. It also:
- Reduces distractions: Less outside noise means better focus.
- Keeps you motivated: You can play music or train hard without worrying.
- Improves acoustics: Less echo means clearer music and instructions.
People often underestimate how much noise affects their energy and motivation. A quiet, comfortable gym helps you stick to your routine.
Another benefit is safety. Less vibration means equipment stays stable and lasts longer. For families, quiet gyms mean kids or partners can rest, study, or work nearby.
Environmental And Health Benefits
Soundproofing isn’t just about comfort. Using materials like recycled rubber or cork also helps the environment. Plus, good acoustic panels can improve air quality by trapping dust and allergens.
Health tip: If you use glue or foam, choose low-VOC (low chemical emission) products. This keeps your gym air fresh and safe.
Eco-friendly mats and panels are now common. Look for certifications like GREENGUARD or FSC (for wood products). For allergy-sensitive families, mineral wool insulation is better than fiberglass, as it traps more particles and resists mold.
Planning Your Soundproofing Project
Before you start, create a plan:
- Measure your gym (length, width, height).
- List your main noise problems.
- Set a budget.
- Research products (read reviews, compare specs).
- Do the easiest fixes first (mats, sealing gaps).
- Test, then add more as needed.
This step-by-step approach saves money and avoids overdoing it.
Another tip: Write down which fixes help most after each step. This creates a record for future upgrades. If you move or build a new gym, you’ll know what works best.

Monitoring Results: How To Know If It’s Working
After each upgrade, test your results:
- Use a decibel meter app on your phone to measure noise before and after.
- Ask family or neighbors if they notice changes.
- Check for less echo and vibration during workouts.
If you still hear noise in other rooms, try layering more solutions (like adding mass or sealing more gaps). Improvement is often step-by-step.
For best results, test at different times—morning, afternoon, and evening. Sometimes noise levels change with temperature or building use.

Credit: uk.walkingpad.com
Maintenance And Long-term Care
Soundproofing materials last for years, but they need some care:
- Clean mats and panels regularly to prevent dust buildup.
- Check seals around doors and windows every 6 months.
- Inspect platforms and pads for wear—replace if compressed or cracked.
Well-maintained materials keep noise low and your gym safe.
If you notice mats getting thin or panels sagging, replace or reinforce them. Inspect for water leaks or mold, especially in basements. Regular care prevents costly repairs and keeps your gym comfortable.
Frequently Asked Questions
How Much Does It Cost To Soundproof A Home Gym?
Costs range widely. Basic DIY steps like mats and acoustic panels can start around $200–$800. Full professional soundproofing (walls, ceilings, doors) can cost $2,500–$8,000 or more. Most people achieve good results with a $500–$2,000 investment, depending on room size and noise level.
What’s The Best Flooring For A Soundproof Home Gym?
Thick rubber mats (at least 3/4 inch) are best for impact and vibration. For heavy lifters, add a plywood platform under the mats. Foam tiles work for lighter workouts but compress over time. Avoid thin mats or hard surfaces like wood or tile.
Can I Soundproof My Gym Without Professional Help?
Yes. Many soundproofing steps are DIY-friendly—laying mats, hanging panels, sealing gaps, and upgrading doors. More complex work (like double walls or decoupled ceilings) may need a contractor, but most home gyms can be quieted with simple tools and materials.
Will Soundproofing My Gym Make It Too Hot Or Stuffy?
It can, if you cover every surface and block vents. Always keep some airflow with openable windows or a mechanical vent. Use breathable materials (like mineral wool) and avoid overfilling with foam. Good ventilation is key for both comfort and health.
Are There Eco-friendly Soundproofing Options?
Yes. Recycled rubber mats, cork flooring, and fabric-wrapped acoustic panels with natural fiber cores are all green choices. Look for low-VOC adhesives and panels. Many brands now offer products made from recycled or renewable materials. For more on eco-friendly building materials, check the EPA’s Green Building Guide.
Soundproofing your home gym is both practical and possible—no matter your budget or space. With the right approach, you’ll enjoy quieter workouts, keep the peace at home, and create a gym environment that supports your goals for years to come.