How to Climate-Control a Garage Gym for Year-Round Training
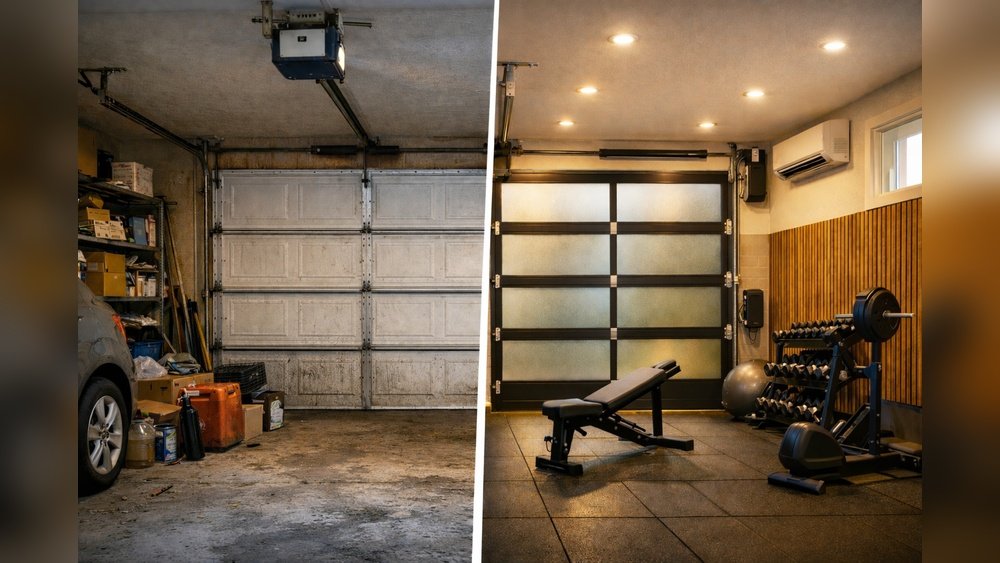
If you’re serious about year-round training in your garage gym, you’ve probably felt the sting of cold metal in winter or the sweat-soaked discomfort of a summer session. A garage is rarely designed for comfort. But with the right approach, you can turn it into a space where you actually want to train—no matter the temperature outside. This guide breaks down the essentials of climate-controlling your garage gym, so you can focus on your fitness goals, not the weather.

Why Climate Control Matters In A Garage Gym
Most garages are built for cars, not people. That means poor insulation, no heating or cooling, and often, gaps that let in dust, pests, and weather. Training in extreme temperatures isn’t just uncomfortable—it can be risky. Here’s why temperature control is a must for home gyms:
- Performance drops: Too hot or cold, and your strength and endurance suffer.
- Safety risks: Slippery floors from sweat or condensation, stiff joints from the cold.
- Equipment life: Extreme humidity or heat can rust weights and damage electronics.
- Consistency: If your gym feels like a sauna or freezer, you’re less likely to stick to your routine.
Climate control helps you train consistently, protects your investment, and keeps you safe.
Think of it this way: Your garage gym is an environment, just like a commercial gym. If that environment is harsh, your body works harder just to adapt, not to improve. For example, cold air can make your muscles tighten up and increase the risk of strains. On the flip side, excessive heat can lead to dizziness or even heat exhaustion, especially during cardio or high-intensity sessions. Over time, these uncomfortable conditions can drain your motivation and cause you to skip more sessions than you’d like to admit.
Additionally, climate control protects more than just your comfort. Many people forget that home gym equipment is a big investment. Benches, racks, barbells, and electronics like treadmills can all suffer in garages that get damp, hot, or icy cold. Over a few years, rust, condensation, and even warping can ruin gear, costing you hundreds or thousands of dollars.
Assessing Your Garage’s Climate Problems
Before you spend money on gadgets, take time to understand your garage’s unique climate issues. Every garage is different—size, location, construction, and even how much sunlight hits it each day. Here’s how to get a clear picture:
- Measure the temperature: Use a thermometer to track highs and lows for a week.
- Check humidity: A simple hygrometer shows if you need dehumidification.
- Feel for drafts: Hold your hand near doors, windows, and walls on a windy day.
- Look for water issues: Pooled water or damp spots mean leaks or poor drainage.
- Identify sun exposure: South-facing garages get hotter in summer.
This data will shape your approach. For example, a dry, sunny garage needs cooling; a damp, shaded one may need heating and dehumidification.
If you want a deeper understanding, pay attention to how your garage feels at different times of day and in different seasons. Notice if the air feels heavy or musty, if the temperature swings a lot, or if you see condensation on the floor or windows.
These signs help you spot not just comfort problems, but also hidden issues like leaks or poor insulation.
A beginner mistake is jumping straight to buying an air conditioner or heater without first knowing the core problems. For example, if your garage is humid, cooling alone won’t solve the sticky feeling or protect your equipment from rust. If you only use fans in a poorly insulated space, you’re just moving hot or cold air around.
Careful observation and cheap measuring tools can save you from wasted money and frustration.
Insulating The Garage: The Foundation Of Climate Control
Insulation is the most important—and often overlooked—step. Without it, any heating or cooling escapes fast. Insulating turns your garage into a buffer against outside weather.
Key Insulation Areas
- Walls: Fiberglass batts are cheap and easy for most garages.
- Ceiling: Heat rises, so an uninsulated ceiling means energy loss.
- Garage door: Most are thin metal. Add rigid foam panels or buy an insulated door.
- Windows: Use double-pane glass or add insulating film.
- Floor: Rubber mats help with cold, but full under-floor insulation is rare.
Insulation Materials Comparison
Here’s a quick look at common insulation types:
| Material | R-Value per Inch | Cost | Ease of Install |
|---|---|---|---|
| Fiberglass Batts | 2.9-3.8 | Low | DIY-Friendly |
| Spray Foam | 6.0-7.0 | High | Pro Recommended |
| Rigid Foam Board | 4.0-6.5 | Medium | DIY Possible |
| Reflective Foil | 1.0 (reflective value) | Low | Easy |
Non-obvious tip: Sealing gaps is as important as installing insulation. Use weatherstripping and caulk for doors, windows, and cracks.
When insulating, remember that small gaps can undo a lot of your hard work. Pay special attention to the edges of the garage door, window frames, and where the walls meet the floor. Even a pencil-thin crack can let in enough outside air to make your heating or cooling system work overtime.
If you’re worried about cost, start with the garage door and ceiling. These are usually the biggest sources of heat loss or gain. Upgrading these first can make a surprisingly big difference, even before you tackle the walls.
Heating Solutions For Winter Workouts
Cold garages can sap motivation and even cause injury. The right heating system makes winter training comfortable and safe.
Types Of Garage Heaters
- Electric Space Heaters: Portable, easy to use, good for small garages.
- Infrared Heaters: Heat objects (like your body) directly, not just air.
- Propane/Natural Gas Heaters: Powerful and efficient, but need venting.
- Ductless Mini-Split Heat Pumps: Permanent, energy-efficient, cool and heat.
- Radiant Floor Heating: Luxurious but expensive, best for new builds.
Heater Comparison Table
| Heater Type | Heat Output (BTU) | Energy Source | Install Cost | Best For |
|---|---|---|---|---|
| Electric Space | 5,000–10,000 | Electricity | Low | Small Spaces |
| Infrared | 5,000–15,000 | Electricity/Gas | Low-Med | Spot Heating |
| Propane/Natural Gas | 15,000–30,000 | Gas | Medium | Large Garages |
| Mini-Split Heat Pump | 9,000–24,000 | Electricity | High | All-Year Use |
Practical tip: Never use unvented gas heaters in a closed garage—they produce carbon monoxide.
Sizing Your Heater
Most garages need around 10 watts per square foot for electric heaters, or 30-60 BTU per square foot for gas heaters. Insulation level and ceiling height affect this. Oversizing wastes energy; undersizing means you never get warm.
Example: For a 400 sq. ft. garage, a 4,000-watt electric heater or a 24,000 BTU gas heater is a good start.
Also, think about how you use your gym. If you mostly do cardio and HIIT, you may be comfortable with a slightly lower temperature than if you focus on heavy lifts and want to avoid cold steel bars. An infrared heater can be especially effective if you train in one section of the garage—it heats you and the equipment directly, rather than the whole air volume.
Non-obvious insight: Place heaters near the floor, since heat rises. Adding a small fan to circulate warm air can help heat the space more evenly and reduce cold spots.
Cooling Solutions For Summer Training
A stuffy, overheated gym kills your drive and can be dangerous. Cooling a garage gym has its own challenges—garages trap heat and have little ventilation.
Cooling Options
- Portable Air Conditioners: Quick to set up, vent out a window or door.
- Ductless Mini-Split ACs: Permanent, efficient, heats and cools.
- Window Units: If your garage has a window, this is a simple solution.
- Evaporative Coolers (“Swamp Coolers”): Good for dry climates, not humid ones.
- Ceiling/Wall Fans: Boost airflow, but don’t actually cool the air.
- Garage Exhaust Fans: Pull hot air out, especially useful after a workout.
Cooling System Comparison
| System | BTU Range | Cost | Best Use |
|---|---|---|---|
| Portable AC | 8,000–14,000 | Low-Med | Rental/Garage with Vents |
| Mini-Split | 9,000–24,000 | High | Permanent, All Climates |
| Window Unit | 5,000–18,000 | Low-Med | Window Present |
| Evaporative Cooler | N/A | Low | Dry Areas Only |
| Ceiling/Wall Fan | N/A | Low | Extra Airflow |
Non-obvious insight: Garages with dark roofs or unshaded walls get much hotter. White paint or roof coatings can reduce inside temps by up to 10°F.
Sizing Your Air Conditioner
A basic rule: 20 BTU per square foot for a garage gym. High ceilings, poor insulation, or direct sun? Add 10–20%.
Example: A 400 sq. ft. garage usually needs an 8,000 BTU air conditioner, but 10,000–12,000 BTU is safer for hot climates.
Don’t overlook the importance of airflow. If you’re on a budget, two strong fans—one pulling air in and one pushing it out—can make a big difference, especially if you train early morning or late evening when outside air is cooler.
Also, avoid using heat-generating equipment (like treadmills) during the hottest part of the day, or move your sessions to cooler times.
Managing Humidity And Moisture
Humidity is often ignored, but it can make your gym feel muggy, damage equipment, and cause mold. Garages in wet climates or with poor airflow are most at risk.
How To Control Humidity
- Dehumidifiers: These pull moisture from the air. Pick a unit rated for your garage size.
- Ventilation: Open windows, use exhaust fans, or install vents to let moist air escape.
- Floor Mats: Rubber mats keep equipment and feet away from damp floors.
- Seal Cracks: Stop water from seeping in during rain.
- Monitor: Use a digital hygrometer. Aim for 40–60% humidity.
Non-obvious tip: If your garage smells musty, check for hidden leaks. Even small water drips can drive up humidity.
Also, check under heavy equipment and in corners for hidden mold or dampness. Sometimes, issues come from a neighbor’s sprinkler, a blocked gutter, or even condensation from your own workouts. Fixing the root cause is always cheaper and more effective than just running a dehumidifier.

Credit: www.ritfitsports.com
Air Quality: Ventilation And Filtration
Training in a closed garage means breathing whatever’s in the air—dust, car fumes, cleaning chemicals. Good ventilation keeps you healthy and comfortable.
Ways To Improve Air Quality
- Exhaust fans: Pull stale air out, especially after workouts.
- Fresh air vents: Bring in outside air—install high on the wall to avoid drafts.
- Air purifiers: Trap dust, pollen, and other particles.
- No-idle zone: Never run cars or gas tools in your gym. Fumes linger.
Practical insight: Even in winter, crack a window for 5 minutes after workouts to clear out CO2 and odors.
Another detail: If your garage is attached to your house, avoid storing chemicals like paint or gasoline nearby. These can affect air quality, especially when mixed with the heat of a workout. An air purifier with a HEPA filter can remove fine dust and allergens, which is helpful if you live in a dusty area or have allergies.
Smart Temperature Control: Thermostats And Automation
Modern climate control isn’t just about heaters and ACs. Smart thermostats and timers make your garage gym comfortable and energy-efficient.
Smart Control Options
- Programmable Thermostats: Set schedules so your gym is ready when you are.
- Remote Control: Start heating or cooling from your phone.
- Zoning: Only climate-control the gym area, not the whole garage.
- Sensors: Monitor temp and humidity, adjust systems automatically.
Example: Set your mini-split to start 30 minutes before your regular workout. No more waiting for the gym to heat up or cool down.
Non-obvious insight: Many smart thermostats learn your schedule over time and can adapt to weather forecasts. Some can send alerts if temperatures or humidity go outside your chosen range—helpful for protecting your gym gear even when you’re away.
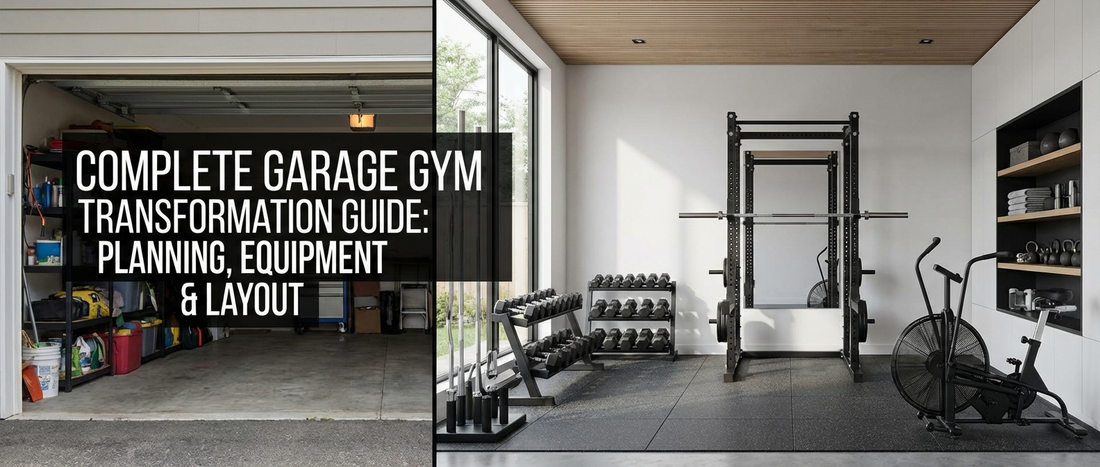
Credit: ctxhomegyms.com
Flooring Choices And Their Impact On Comfort
The garage floor gets cold and can be slippery. The right gym flooring improves comfort, safety, and even insulation.
Best Flooring Options
- Rubber mats or tiles: Shock-absorbing, insulate against cold, easy to clean.
- Foam tiles: Soft, but less durable for heavy weights.
- Carpet tiles: Add warmth, but may absorb sweat.
- Vinyl rolls: Waterproof and easy to clean.
Practical tip: Use thicker rubber in lifting zones, thinner mats for cardio/stretch areas.
A detail beginners often miss: If your garage slopes toward the door (for drainage), use interlocking tiles to create a level surface. This not only improves comfort but also keeps equipment stable.
Window And Door Upgrades
Windows and doors are weak spots in your garage’s climate barrier. Upgrades here can have a big impact.
Improving Doors
- Insulated garage doors: Reduce heat loss/gain by up to 70%.
- Weatherstripping: Stops drafts and dust.
- Threshold seals: Block water and insects.
Upgrading Windows
- Double- or triple-pane glass: Better insulation.
- Insulating film: Cheap and easy for single-pane windows.
- Blackout shades: Block sun and heat in summer.
Non-obvious insight: Window leaks are often at the frame, not the glass. Check for gaps and seal with caulk.
If you’re renting or want a quick fix, even thick curtains or old blankets can help insulate windows and stop cold air at night.
Lighting And Its Impact On Temperature
Gym lighting isn’t just about visibility. Some types add heat, others keep your space cooler.
- LED lights: Bright, energy-efficient, and don’t heat up the room.
- Fluorescent: Use less energy, but may not work well in cold garages.
- Halogen/incandescent: Avoid—too hot and inefficient.
Example: Replacing four old bulbs with LEDs can lower garage temps by 2–3°F in summer.
Another tip: Use adjustable fixtures to direct light only where you need it, reducing wasted energy and heat.
Zoning Your Garage Gym For Climate Efficiency
Not all parts of your gym need the same temperature. Zoning lets you control climate where you actually train.
- Curtains or dividers: Hang heavy curtains to section off your gym area.
- Portable heaters/fans: Use only in your workout zone.
- Door seals: Separate gym from storage or car area.
Practical tip: Heating a smaller zone saves energy and costs.
A creative example: Some people use bookcases or folding screens as dividers, which also double as storage for gym gear.
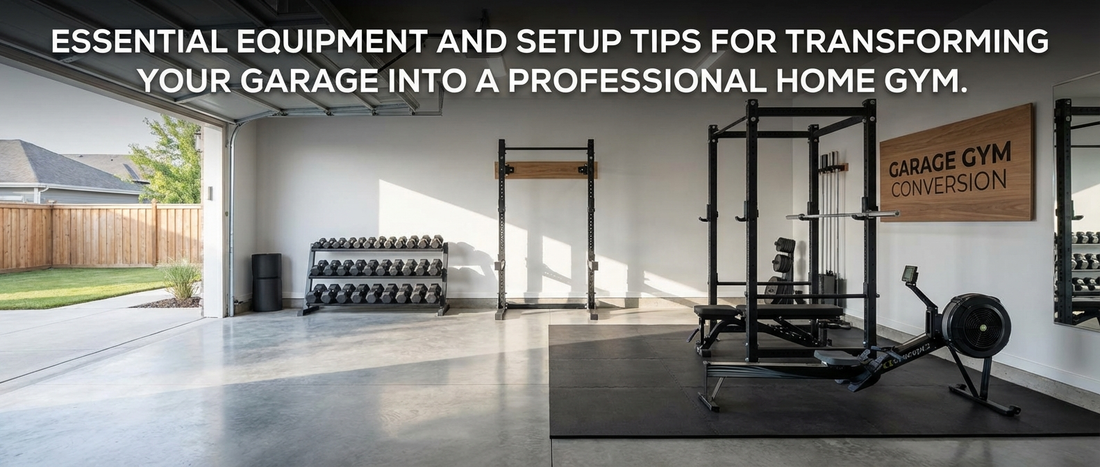
Credit: ctxhomegyms.com
Real-world Garage Gym Climate Control Examples
Let’s look at how different garage gym owners manage climate:
- Small single-car garage in Texas: Owner uses a portable AC (10,000 BTU), window insulation film, rubber mats, and a ceiling fan. Humidity stays under 50% with a small dehumidifier.
- Two-car garage in Minnesota: Spray foam insulation, mini-split heat pump for both heat and AC, insulated garage door. Uses a smart thermostat and splits the gym from car storage with a heavy curtain.
- Detached garage in humid Florida: Window AC (12,000 BTU), two exhaust fans, thick rubber flooring, and a large dehumidifier. All gaps sealed with weatherstripping.
Each setup is different, but all focus on insulation, proper heating/cooling, humidity control, and smart zoning.
Non-obvious insight: Owners who track temperature and humidity with smart sensors often catch problems (like a failed dehumidifier or an open window) before they become big issues.
Budgeting For Climate Control
Climate-controlling a garage gym is an investment, but you can phase upgrades over time. Here’s a rough breakdown:
- Insulation: $500–$2,000 (DIY or pro)
- Heater: $100–$800 (space heater to mini-split)
- Air conditioner: $250–$2,500 (portable to mini-split)
- Dehumidifier: $150–$400
- Fans/ventilation: $50–$500
- Weatherstripping/door seals: $50–$200
- Smart thermostat: $100–$250
Pro tip: Start with insulation and sealing—these save on heating/cooling bills and improve comfort more than any gadget.
If your budget is tight, do the upgrades in stages. Many people start with weatherstripping and basic insulation, then add fans or a heater, and later invest in more expensive systems like mini-splits or new garage doors.
Common Mistakes To Avoid
Even smart garage gym owners miss these:
- Ignoring insulation: Heating/cooling without insulation is like running AC with the window open.
- Oversizing HVAC units: Bigger isn’t always better—oversized units short-cycle and cost more to run.
- Underestimating humidity: Rust, mold, and odors are slow but serious.
- Poor air flow: Stale air makes workouts hard and can affect health.
- Blocking vents: Don’t stack gear in front of heaters, ACs, or fans.
Non-obvious insight: Garage gym climate problems aren’t solved in one weekend—plan, prioritize, and upgrade as you go.
Another mistake: Not checking local building codes if you install permanent systems. Some areas require permits or inspections for heaters, ACs, or electrical work.

Step-by-step: Climate-controlling Your Garage Gym
Here’s a roadmap to turn your garage into a comfortable, all-season gym:
- Seal and insulate: Start with walls, ceiling, garage door, windows, and any cracks.
- Install or upgrade doors/windows: Add weatherstripping and insulation film.
- Pick your heating/cooling: Choose systems sized for your space and needs.
- Add humidity control: Get a dehumidifier if humidity stays above 60%.
- Boost ventilation: Install fans or vents for fresh air and odor control.
- Upgrade flooring: Lay rubber mats or tiles in main training areas.
- Automate: Use smart thermostats or timers to save energy and time.
- Zone your gym: Use curtains, doors, or dividers for targeted comfort.
- Monitor and adjust: Check temp and humidity weekly; tweak your setup as needed.
Example timeline: Many owners take 6–12 months, upgrading in steps as budget allows.
Non-obvious insight: Take photos before and after each step. Not only does this help track progress, but it also helps if you ever want to sell your home—potential buyers appreciate a well-documented, comfortable garage gym.
Environmental And Energy Impact
Climate-controlling your garage gym uses energy—but smart design can minimize your footprint and bills.
- Insulation first: Cuts heating/cooling needs up to 40%.
- Smart thermostats: Reduce wasted energy by only running when needed.
- Efficient systems: Mini-splits and Energy Star-rated devices use less power.
- LED lighting: Lower power draw and less heat output.
Non-obvious tip: Adding solar panels to your garage roof can offset the energy used for climate control.
If you’re eco-minded, consider using reclaimed or recycled materials for insulation and flooring. Also, check for local rebates on energy-efficient upgrades. Many utility companies offer discounts for improving insulation or installing smart thermostats.
When To Call A Professional
Some upgrades are easy DIY, but others need pro help:
- Electrical work: Upgrading for heaters/ACs or adding outlets.
- Gas heaters: Safe installation and venting.
- Spray foam insulation: Best done by specialists.
- Mini-split systems: Professional install required for warranties.
Pro insight: Get quotes from at least two contractors, and ask about rebates for energy-efficient upgrades.
Also, look for contractors with experience in garage or outbuilding conversions, not just home HVAC. They can spot unique garage issues, like special venting needs or tricky insulation spots.
Maintaining Your Climate System
Regular maintenance keeps your gym comfortable and safe:
- Change or clean filters: Every 1–3 months for ACs, heaters, and purifiers.
- Check seals and insulation: Look for new gaps every season.
- Empty dehumidifiers: Or use a hose for continuous drainage.
- Clean fans and vents: Prevent dust buildup and improve airflow.
Non-obvious insight: Track your electric bill. Big jumps can signal a problem with climate equipment.
A good seasonal habit: Do a quick “climate check” before each season. Run each system (heater, AC, dehumidifier, fans) and make sure it starts up and runs quietly. Catching problems early means fewer workout interruptions.
Training Adjustments By Season
Even with perfect climate control, adjust your routine for best results:
- Winter: Warm up longer, dress in layers, keep water slightly warm.
- Summer: Hydrate more, shorten rest times, train during cooler hours.
- All year: Have a towel for sweat and a mat for cold floors.
Pro tip: Listen to your body—if you feel overheated or chilled, stop and reassess.
In extreme weather, don’t be afraid to change your workout style. For example, swap out heavy lifting for bodyweight moves in extreme cold, or try mobility and stretching in high heat. The goal is to stay consistent, even if you adapt your sessions.

Frequently Asked Questions
How Can I Keep My Garage Gym Cool Without An Air Conditioner?
You can reduce heat by insulating walls and the garage door, using reflective window film, and installing ventilation fans. Ceiling or wall fans improve airflow. Light-colored paint on the roof and walls reflects sun. For more ideas, see U.S. Department of Energy’s cool roofs guide.
Is It Safe To Use A Space Heater In My Garage Gym?
Yes, but only use electric models. Keep heaters away from water, flammable materials, and never leave them running unattended. Avoid unvented propane or kerosene heaters due to carbon monoxide risk.
What Humidity Level Is Best For A Garage Gym?
Aim for 40–60% humidity. Too high, and you’ll get mold and rust; too low, and air feels dry and uncomfortable. Use a digital hygrometer to monitor levels.
Can I Install A Mini-split Myself?
While some handy homeowners do, most brands require professional installation for the warranty. Mini-splits need special tools and safe handling of refrigerants. It’s best to hire a pro.
How Much Does It Cost To Climate-control A Garage Gym?
Costs vary, but most people spend $1,500–$4,000 for insulation, basic heating/cooling, and humidity control in a two-car garage. Upgrades like mini-splits or spray foam cost more, but you can do it in stages.
—
A climate-controlled garage gym is the key to consistent, safe, and enjoyable training all year. Start with insulation and sealing, then add heating, cooling, and ventilation for your needs and climate. Use smart controls and zone your gym to save energy. With a step-by-step approach, you’ll create a space where every workout feels just right—no matter what’s happening outside.